Home > Provider User Manual > 6 Child Screenings > 6.2 Adding a Screening
6.2 Adding a Screening
There are two methods for entering ASQ-3, and ASQ:SE-2
screening results for a child: the Long Form or the Short Form.
6.2.1 Adding an ASQ-3, or ASQ:SE-2 Screening via the Long Form
The ASQ-3, & ASQ:SE-2 Online Long Forms are similar
to the paper versions of the questionnaires, but without the graphics. The Long
Form contains all questionnaire items in addition to a Comments section in
which a parent’s comments can be entered. The answers you enter for each item
are automatically converted to their numerical value and automatically totaled
according to the ASQ-3 or ASQ:SE-2 scoring logic.
To add a screening to a
Child Profile, via the Long Form:
- Select Child
Profiles from the top navigation menu.
- Browse the Child Profiles list or
search for a Child Profile.
3.
Click on the child’s name to access his or her
profile.
4.
On
the Child Profile Details page,
click the Add tab, next to the Child
Screenings tab. Or, select the Add
Screening Quick Link.
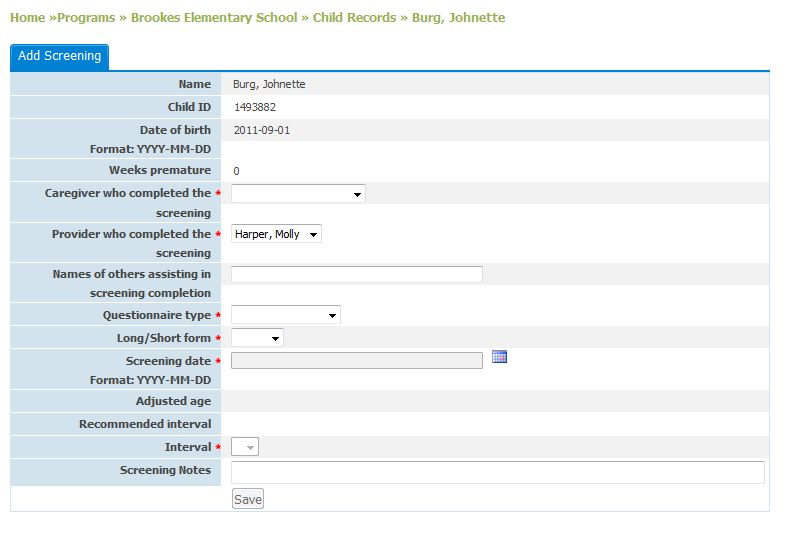
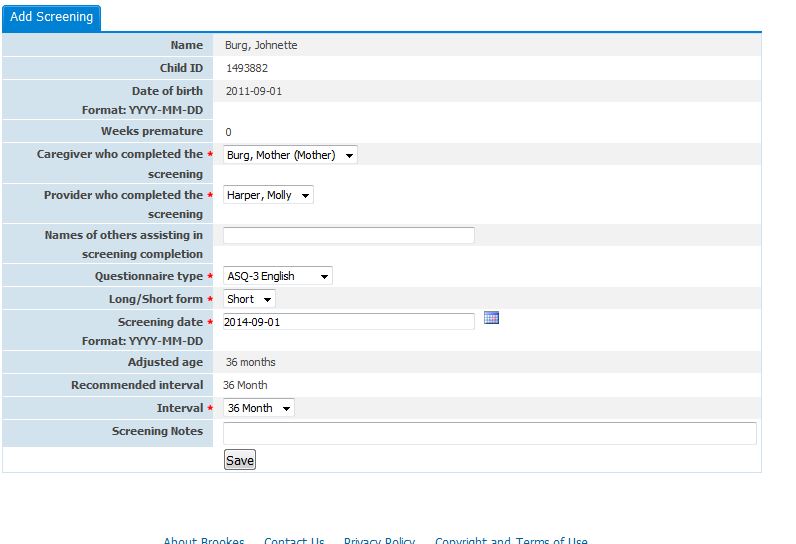
5.
On
the Add Screening page, fill in the
following fields: (Items marked with an asterisk [*] are required)
a.
Caregiver
who completed the screening*
b.
Names
of others assisting in screening completion
c.
Questionnaire
type*: ASQ-3, or ASQ:SE-2
(NOTE: The Questionnaire type
drop-down menu will only list the questionnaires that your program has
purchased. If you are unable to locate the questionnaire type that is needed to
enter in your new questionnaire, please contact your Program Administrator.)
d.
Long/Short
form*: Select Long form.
e.
Screening
date*: Once this is entered, the Adjusted age, Recommended interval, and
Interval will be calculated and automatically entered in the next 3 fields.
f.
Adjusted
age: This field is not editable.
g.
Recommended
interval: This field is not editable.
h.
Interval*:
After reviewing the Adjusted age and Recommended interval, if for any reason
you decide to enter an interval other than the one recommended, you may do so
here.
i.
Reason
for out of range*: If you select an interval other than the recommended
interval, you will be required to record why you are using an interval outside
of the recommended range for the child.
j.
If
desired you may add up to a 24 character screening note. This field can also be completed and edited at any time before or after screening is finalized.
6.
Click
Save.
You will be directed to
the Long Form for questionnaire results data entry.
For ASQ-3, and
ASQ:SE-2, notice the tabbed areas across the top of the screen. You can start completing an area by clicking on the tab.
7.
For
each item, select the button that indicates the caregiver’s answer to that
item. If the caregiver did not answer the item, select the button for “RESPONSE
MISSING.”
8.
If
a caregiver wrote a note regarding an item in the questionnaire, you may record
this note by clicking the Add-comment
icon [ ] to the right of the item. A text
box will then appear below the item.
Please type the contents of the caregiver’s comment into the text box.
] to the right of the item. A text
box will then appear below the item.
Please type the contents of the caregiver’s comment into the text box.
As you fill out each
page, you will notice a score next to each item and, for ASQ-3, an area total
score will appear at the bottom of each page.
9.
For
ASQ-3, when finished answering all items in an area, and for ASQ:SE-2,
when finished answering all items on a page, scroll to the bottom of the page
and click on the right-facing arrow
icon [ ] to move to the next set of
questions.
] to move to the next set of
questions.
10.
The
page will reload and you will now be on the next tab containing the next set of
questions.
NOTE: If you click the Save in Progress button instead of the right-facing arrow icon, the page will reload, but you will need to manually click on the
next tabbed area to get to the next set of questions. You may click Save in
Progress to save what you have entered so
far for the screening. Once you click Save in Progress, you may exit out of the screening, and you will find it listed under
the Child’s Screenings tab marked “Incomplete.” Click on the name of the
questionnaire to resume entering screening results.
11. Continue steps 4
through 7 until you have recorded the caregiver’s response to each item on the
questionnaire.
12. Once you reach the
Overall tab, record all caregiver answers and select the Save in Progress button. The page will then reload and a Finalize button will appear next to the
Save in Progress button.
13. To finish the screening
and generate the Information Summary Sheet, click the Finalize button. Your program will be charged for this screening.
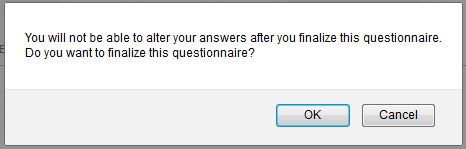
14. A pop-up window will
appear that says “You will not be able to alter your answers after you finalize
this questionnaire. Do you want to finalize this questionnaire?” Click OK to continue.
15. When the questionnaire
is finalized, the Information Summary Sheet appears and is listed as the final
tab for this screening. From here you may print a copy of the Information
Summary Sheet, print the completed questionnaire, print the completed questionnaire with the Information Summary Sheet, add a task, add another screening for the child, or return to
the child’s profile – all located under Quick Links.
TIP: You are strongly encouraged to enter task for this child
after reviewing his or her Information Summary Sheet. The decision you make
after reviewing the child’s scores and the cutoff scores can be easily recorded
as a task that you are then reminded to complete. ASQ Online will provide you
with a pop-up reminder to add task for this child, when you are navigating away
from the Information Summary page.
NOTE: You can still enter screening results for a child
even if the child does not have a consent form file.
6.2.2 Adding an ASQ-3 Screening via the Short Form
By entering the ASQ-3
screening results for a child via the Short Form, you are choosing to view only
the item numbers from the ASQ-3 questionnaire. The Short Form is intended for
quick and easy data entry. The answers you select for each
item are automatically converted to their numerical value, and automatically
totaled according to the ASQ-3 scoring logic.
To add an ASQ-3
screening to a Child Profile via the Short Form:
1. Select Child
Profiles from the top navigation menu.
2. Browse
the Child Profiles list or search for a Child Profile.
3.
Click on the child’s name to access his or her
profile.
4.
On
the Child Profile Details page,
click the Add tab to the right of the
Child Screenings tab. Or, select the Add
Screening Quick Link.
5.
On
the Add Screening page, fill in the
following fields: (Items marked with an asterisk [*] are required)
a.
Caregiver
who completed the screening*
b.
Names
of others assisting in screening completion
c.
Questionnaire
type*: Select ASQ-3 (NOTE: The
Questionnaire type drop-down menu will only list the questionnaires that your
program has purchased. If you are unable to locate the questionnaire type that
is needed to enter in your new questionnaire, please contact your Program
Administrator.)
d.
Long/Short
form*: Select “Short.”
e.
Screening
date*: Once this is entered, the Adjusted age, Recommended interval, and
Interval will be calculated and automatically entered in the next 3 fields.
f.
Adjusted
age: This field is not editable.
g.
Recommended
interval: This field is not editable.
h.
Interval*:
After reviewing the Adjusted age and Recommended interval, if for any reason
you decide to enter an interval other than the one recommended, you may do so
here.
i.
Reason
for out of range*: If you have selected an interval other than the recommended
interval, you will be required to record why you are using an interval outside
of the recommended range for the child.
j.
If
desired you may add up to a 24 character screening note.
6.
Click
Save.
You will be directed to
the Short Form for questionnaire results data entry. All answers for a
screening can be entered into the Short Form on a single web page.
7.
For
each item, select Y, S, N, or X from the drop-down menu, indicating an answer
of Yes, Sometimes, Not Yet, or Response Missing. If the caregiver did not
answer the item, select “X” (Response Missing).
8.
One
main difference between the Short and Long Forms is that the Short Form does
not allow you to enter a caregiver comment for each item. Instead, Add-comment icons are only available for
those questions where a caregiver or child was instructed to write something on
the questionnaire. You may record these notes by clicking the Add- Comment icon [] to the right of the item. A text
box will then appear below the item. Please type the contents of the caregiver
or child’s comment into the text box.
NOTE: For items that ask a child to draw something in the
space provided, please use the comment box to verbally explain the content of
the child’s drawing.
9.
When finished answering all items, click the Save in Progress button. The page will
then reload and a Finalize button
will appear next to the Save in Progress
button.
10.
To finish the screening and generate the Information Summary
Sheet, click the Finalize button. Your
program will be charged for the screening.
11.
A pop-up window will appear that says “You will not be able to
alter your answers after you finalize this questionnaire. Do you want to
finalize this questionnaire?” Click OK
to continue.
12.
When the questionnaire is finalized, the Information Summary Sheet appears and is listed as the final tab for this screening. From here you may print a copy of the Information Summary Sheet, print the completed questionnaire, print the completed questionnaire with the Information Summary Sheet, add a task, add another screening for the child, or return to the child’s profile – all located under Quick Links.
NOTE: A score will not appear on the Short Form until the
questionnaire is finalized.
TIP: You are strongly encouraged to enter a task for this child
after reviewing his or her Information Summary Sheet. The decision you make
after reviewing the child’s scores and the cutoff scores can be easily recorded
as a task that you are then reminded to complete. ASQ Online will provide you
with a pop-up reminder to add a task for this child, when you are navigating
away from the Information Summary page.
NOTE: You can still enter screening results for a child
even if the child does not have a consent form file.
6.2.3 Adding an ASQ:SE -2 Screening via the Short Form
By entering the ASQ:SE/ASQ:SE-2
screening results for a child via the Short Form, you are choosing to view only
the item numbers from the ASQ:SE/ASQ:SE-2 questionnaire. The Short Form is
intended for quick and easy data entry. The answers you
select for each item are automatically converted to their numerical value and
automatically totaled according to the ASQ:SE/ASQ:SE-2 scoring
logic.
To add an ASQ:SE/ASQ:SE-2
screening to a Child Profile via the Short Form:
1. Select Child
Profiles from the top navigation menu.
2. Browse
the Child Profiles list or search for a Child Profile.
3.
Click on the child’s name to access his or her
profile.
4.
On
the Child Profile Details page,
click the Add tab next to the Child
Screenings tab. Or, select the Add
Screening Quick Link.
5.
On
the Add Screening page, fill in the
following fields: (Items marked with an asterisk [*] are required)
a.
Caregiver
who completed the screening*
b.
Names
of others assisting in screening completion
c.
Questionnaire
type*: Select ASQ:SE/ASQ:SE-2 (NOTE: The
Questionnaire type drop-down menu will only list the questionnaires that your
program has purchased. If you are unable to locate the questionnaire type that
is needed to enter in your new questionnaire, please contact your Program
Administrator.)
d.
Long/Short
form*: Select “Short.”
e.
Screening
date*: Once this is entered, the Adjusted age, Recommended interval, and
Interval will be calculated and automatically entered in the next 3 fields.
f.
Adjusted
age: This field is not editable.
g.
Recommended
interval: this field is not editable.
h.
Interval*:
After reviewing the Adjusted age and Recommended interval, if for any reason
you decide to enter an interval other than the one recommended, you may do so
here.
i.
Reason
for out of range*: If you have selected an interval other than the recommended
interval, you will be required to record why you are using an interval outside
of the recommended range for the child.
j.
If
desired you may add up to a 24 character screening note.
6.
Click
Save.
You will be directed to
the Short Form for questionnaire results data entry. All answers for a
screening can be entered into the Short Form on a single web page.
7.
For
each item, select the button that indicates the caregiver’s answer to that item
(“Most Of The Time,” “Sometimes,” “Rarely Or Never”). If the caregiver did not
answer the item, select the button for “Response Missing.” Put a checkmark in
the box under the “Concern” column if a caregiver indicated concern on a
specific question.
8.
One
main difference between the Short and Long Forms is that the Short Form does
not allow you to enter a caregiver comment for each item. Instead, Add-comment icons are only available for
those questions where a caregiver or child was instructed to write something on
the questionnaire. You may record these notes by clicking the Add- comment icon [] to the right of the item. A text
box will then appear below the item. Please type the contents of the caregiver
or child’s comment into the text box.
NOTE: For items that ask a child to draw something in the
space provided, please use the comment box to verbally explain the content of
the child’s drawing.
9.
When finished answering all items, click the Save in Progress button. The page will
then reload and a Finalize button
will appear next to the Save in Progress
button.
10.
To finish the screening and generate the Information Summary
Sheet, click the Finalize button. Your
program will be charged for the screening.
11.
A pop-up window will appear that says “You will not be able to
alter your answers after you finalize this questionnaire. Do you want to
finalize this questionnaire?” Click OK to
continue.
12.
When the questionnaire is finalized, the Information Summary Sheet appears and is listed as the final tab for this screening. From here you may print a copy of the Information Summary Sheet, print the completed questionnaire, print the completed questionnaire with the Information Summary Sheet, add a task, add another screening for the child, or return to the child’s profile – all located under Quick Links.
NOTE: A score will not appear on the Short Form until the
questionnaire is finalized.
TIP: You are strongly encouraged to enter a task for this child
after reviewing his or her Information Summary Sheet. The decision you make
after reviewing the child’s scores and the cutoff scores can be easily recorded
as a task that you are then reminded to complete. ASQ Online will provide you
with a pop-up reminder to add a task for this child, when you are navigating
away from the Information Summary page.
6.2.4 Saving a Partially-Completed Screening in Progress
When entering screening
results, you may click Save in Progress
at any time to save what you have entered so far for the screening. Once you
click Save in Progress, you may exit
out of the screening, and you will find it listed under the Child’s Screenings
tab marked “Incomplete.” Since it is
incomplete, this screening and its results will not be included in any reports
until it is finalized. Additionally, your account will not be charged a screen
fee until the screen is finalized.
If you have a partially
completed screening saved, click on the name of the questionnaire at any time
to resume entering screening results.

6.2.5 Finalizing a Screening
Once
you have finished entering a screening, you can finalize it. Finalizing a
screening will mark the Status as “Complete” under the Child Screenings tab on
the Child Profile page. Once you
have finalized a screening, the screening and its results will be included in
reports, and you cannot go back into the questionnaire to make any changes.
To finalize a screening, make sure all items from your
questionnaire have been filled in and any subsequent responses have been
entered. At the bottom of the questionnaire page, click the Finalize button. A pop-up window will
appear saying, “You will not be able to alter your answers after you finalize
this questionnaire. Do you want to finalize this questionnaire?” If you wish to
finalize it, click OK. If you wish to
go back and make changes, or do not want to finalize it at this time, click Cancel.
Once you have finalized a screening, you will be taken to the Information Summary page, where you can
schedule a follow-up task for the child.
See also