Home > Program Administrator User Manual > 10 Screening Management > 10.5 Packets
10.5 Packets
Packets are groups of documents that can be printed and
mailed together to aid in the screening management of your program. There are
two types of packets for Program Administrators in ASQ Online: System Packets
and Program Packets.
System packets are packets provided by the ASQ Online
system. Program packets are packets that a Program Administrator can create and
customize, and can be generated and downloaded by all users in the program.
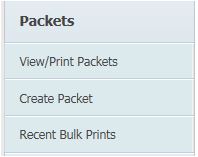
10.5.1 View/Print Packets
The View/Print Packets page is
where you will go to generate and download packets. Once a packet is generated,
its corresponding task will be completed in the system. You can view all
children that you have generated a packet for by clicking the Child List link next to the packet.
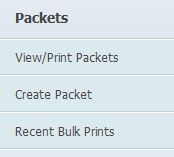
Clicking the View/Print
Packets Quick Link on the Screening
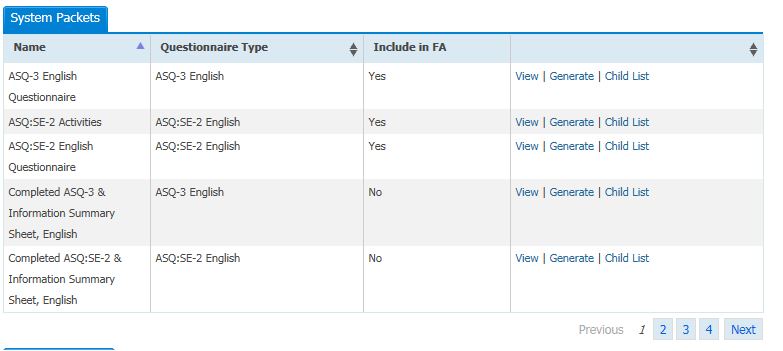
Management page will take you to a list of all system packets and program
packets. The first five packets will be listed, including the name of the
packet, the questionnaire type, and options to view the packet, generate the
packet, and view the child list.
Use the Next
button below the list of packets to scroll through all system and program
packets available.
10.5.2 System Packets
System packets are packets provided by the ASQ Online system. These packets
include groups of documents to aid you in completing the associated task. You
can’t edit system packets; if you wish to customize a packet for your program,
you can create a program packet.
Below is a list of the system packets available in ASQ
Online, and the documents that are included in each packet:
Viewing System Packets
You can view the contents of system packets, and preview
the documents that make up the packet from the View/Print Packets page.
To view system packets:
1.
Select Screening
Management from the top navigation menu.
2.
Select the View/Print Packets Quick Link.
3.
Under the System Packets section, find the
packet that you would like to view. Click the View link to the right of that packet.
4.
On the Packet
Details page, you can view the documents included in the packet, including
the document name, the category (Screening, Follow-up, or Other), and the
document type (For system packets, all documents will be system documents).
5.
If the document has dynamic content that will
automatically populate with program, caregiver, and child information, there
will be a Download Preview link to
the right of the document. You can click this link to view a sample of what the
document will look like when you generate the packet.
6.
If the document does not include dynamic
content, there will be a Download link
to the right of the document. You can click this link to view what the document will
look like when you generate the packet.
10.5.3 Program Packets
Program Administrators can create customized program
packets, which can be generated and downloaded by all users of their program.
Program packets can include any system documents as well as any program
documents created by the Program Administrator. (System documents are documents
provided by the ASQ Online system, and program documents are documents that the
Program Administrator has created.) Once a program packet is created, it will
appear in the Program Packets section on the View/Print Packets page. From there, you can view the packet,
generate the packet, edit or delete the packet, and view a list of children for
whom the packet has been generated.

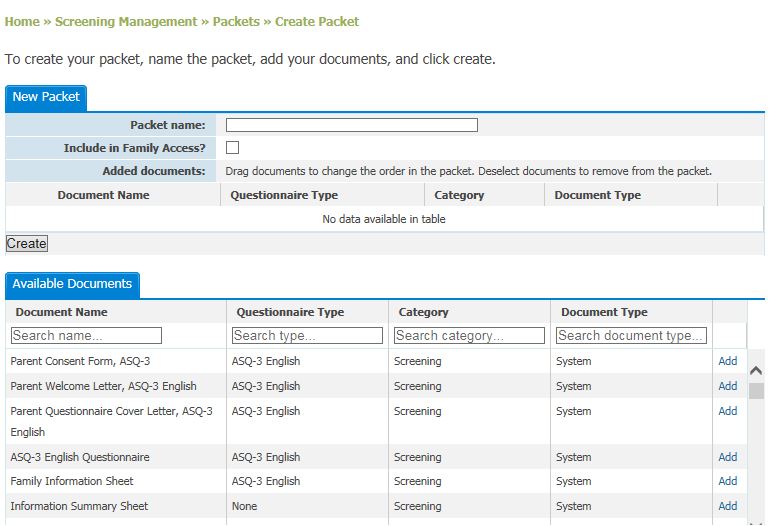
10.5.3.1 Creating Packets
To create a packet, you will name the packet, and add the documents. You
can search for available documents to add to the packet by document name,
questionnaire type, category (Screening, Follow-up, or Other), and document
type (System or Program).
To create a program packet:
1.
Select Screening
Management from the top navigation menu.
2.
Select the Create Packet Quick Link.
3.
Enter a name for the packet in the “Packet
name” field.
4.
Select the documents to add to the packet,
from the Available Documents section.
a.
You can search for documents by document
name, questionnaire type, category, and document type. To search within a
column, begin typing the name of what you are searching for. ASQ Online will
automatically pull up any documents fitting the information you have typed in
the search field.
b.
Click the Add
link to the right of the document that you wish to add. You can add as many
documents as you would like to your program packet.
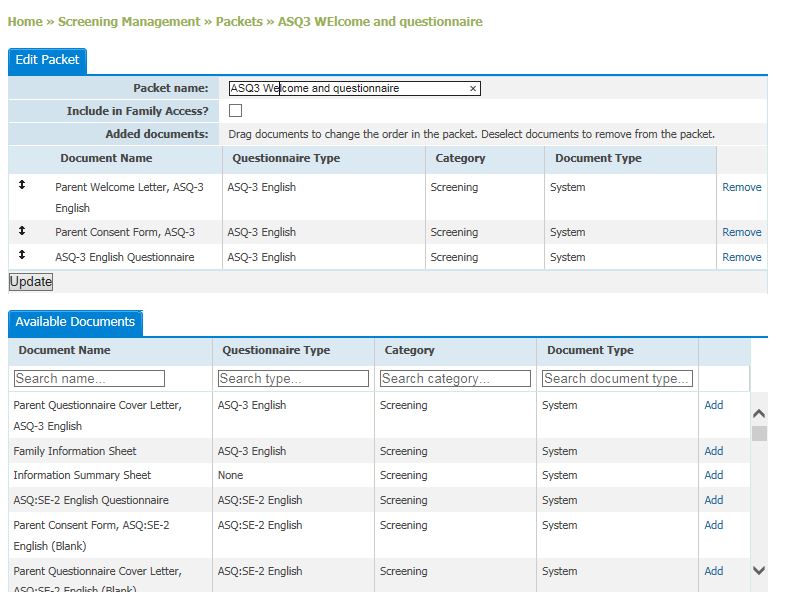
5.
Once you have added the documents to the
packet, you can change the order in which they will appear when the packet is
generated, by dragging the documents. To drag the documents, click and hold the
arrow icon to the left of the document, and move the document to the desired
position.
6.
If you would like to remove a document from
the packet, click the Remove link to
the right of the document.
7.
When finished, click the Create button.
This packet will appear under Program Packets on the View/Print Packets page.
10.5.3.2 Viewing, Editing, & Deleting
Program Packets
Viewing Program Packets
You can view the contents of program packets, and preview
the documents that make up the packet from the View/Print Packets page.
To view program packets:
1.
Select Screening
Management from the top navigation menu.
2.
Select the View/Print Packets Quick Link.
3.
Under the Program Packets section, find the
packet that you would like to view. Click the View link to the right of that packet.
4.
On the Packet
Details page, you can view the documents included in the packet, including
the document name, the category (Screening, Follow-up, or Other), and the
document type (System or Program).
5.
If the document has dynamic content that will
automatically populate with program, caregiver, and child information, there
will be a Download Preview link to
the right of the document. You can click this link to view a sample of what the
document will look like when you generate the packet.
6.
If the document does not include dynamic
content, there will be a Download link
to the right of the document. You can click this link to view what the document
will look like when you generate the packet.
Editing & Deleting Program Packets
To edit or delete a program packet:
1.
Select Screening
Management from the top navigation menu.
2.
Select the View/Print Packets Quick Link.
3.
Under the Program Packets section, find the
packet you would like to edit or delete.
a.
To edit the packet, click the Edit link to the right of the packet.
Make any desired changes to the packet and then click the Update button.
b.
To delete the packet, click the Delete link to the right of the packet.
10.5.4 Generating & Downloading Packets
Generating a packet will serve two purposes. First, it
will automatically complete the task associated with that packet. Second, it
will allow you to download the packet as a PDF file, so that you can print and
mail it to the caregiver.
To generate a packet:
- Select
Screening Management from the
top navigation menu.
- Click
the View/Print Packets Quick
Link.
- Locate
the packet you would like to generate and click the Generate link.
- Locate
the child for whom you would like to generate this packet and click the Download link.
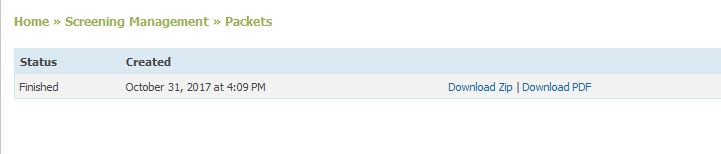
- When
the packet has finished generating, click the Download File link. You can then open the PDF file or save it
to your computer.
When you click the Generate
link next to a packet, you will be taken to a page where you select the
child or children for whom you would like to generate this packet. You will see
four tabs and multiple search fields to assist you in quickly and easily
locating the children for whom you are generating the packet.
The four tabs are: Screenings Due, Tasks Due, Child
Profiles, and Completed Screenings.

Once a packet has been generated and downloaded it will be available for a limited time under Recent Bulk Prints via the Quick Links in Screening Management.
10.5.4.1
Generating via the Screenings Due Tab
The Screenings Due tab will list all screening tasks that
are scheduled to be sent out to caregivers. Once you generate the packet for a
child listed under Screenings Due, that task will move to Screening Tasks
Completed (a screening task is completed when the packet has been generated).
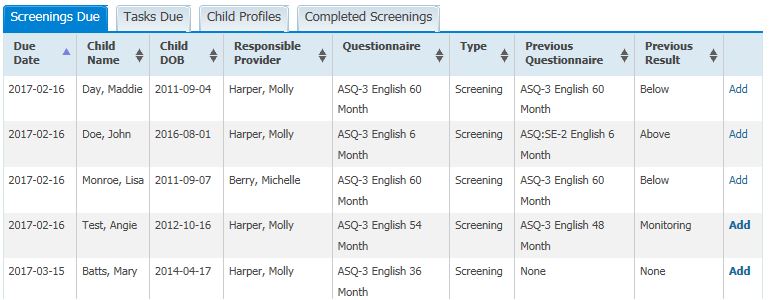
The Screenings Due list includes the due date, the child
name, the child DOB, responsible Provider, questionnaire, type, previous
questionnaire, and previous result. You can easily search through the list of
screenings due and narrow it down by using the Search field at the top of the
page. You can search by due date, child DOB, child name, child ID, child alt.
ID, Provider name, type, questionnaire, previous questionnaire, and previous
result. To search, begin typing what you are searching for in the corresponding
text field and ASQ Online will automatically pull up any results matching your
search.
When you have located the child for whom you would like
to generate this packet, click the Download
link to the right of the child’s name. The file will run and then a Download File link will appear. Click
this link and a pop-up window will appear and you can choose to open or save
this PDF file.
Once you download the packet and refresh the page, ASQ
Online will update the Screenings Due list – the child you have generated the
packet for will no longer be listed under Screenings Due. This will help you
keep track of which children you still need to generate screening packets for.
10.5.4.2 Generating via the Tasks Due Tab
The Tasks Due tab will list all non-screening tasks that are due for
completion. Once you generate a packet for a child listed under the Tasks Due
tab, the task will move to Tasks Completed (a task is completed when the
corresponding packet has been generated).
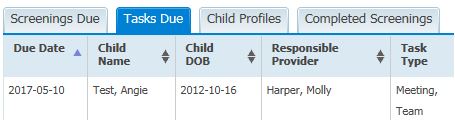
The Tasks Due list includes the due date, the child name,
the child DOB, the responsible Provider, the task type, the previous
questionnaire, and the previous result. You can easily search through the list
of tasks due and narrow it down by using the Search field at the top of the
page. You can search by due date, child DOB, child name, child ID, child alt.
ID, Provider name, task type, previous questionnaire, and previous result. To
search, begin typing what you are searching for in the corresponding text field
and ASQ Online will automatically pull up any results matching your search.
When you have located the child for whom you would like
to generate this packet, click the Download
link to the right of the child’s name. The file will run and then a Download File link will appear. Click
this link and a pop-up window will appear and you can choose to open or save
this PDF file.
If you are generating a packet that includes screening
documents, you have the option to customize the interval. If the packet
includes screening documents (such as a questionnaire), you will see a Customize link to the right of the
child. Clicking this link will pull up a pop-up box, which includes the recommended
interval. If you would like to use the recommended interval in order to
generate a blank questionnaire for the next screening for the child, click the Use Interval button. If you would like
to generate the packet with a screening that has already been completed for the
child, you can select the interval (including the date the child was screened)
from the “Completed Screening” drop-down menu, and click the Use Screening button. The packet will
then generate with the completed screening for that child.
Once you download the packet and refresh the page, ASQ
Online will update the Tasks Due list – the child you have generated the packet
for will no longer be listed under Tasks Due. This will help you keep track of
which children you still need to generate task packets for.
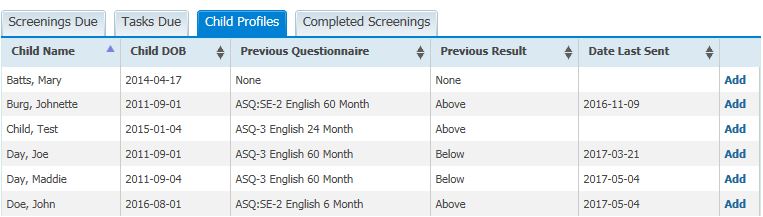
10.5.4.3 Generating via the Child
Profiles Tab
The Child Profiles tab will list all of the Child Profiles in your program.
This tab will allow you to generate a packet for a child in your program who
doesn’t necessarily have a screening or non-screening task scheduled for
completion.
The Child Profiles tab lists the child name, the child
DOB, the previous questionnaire, the previous result of that questionnaire, and
the date the questionnaire was last sent. You can search for specific children
by date last sent, child DOB, child name, child ID, child alt. ID, previous
questionnaire, and previous result. You can also choose to search for only
those children that have not had materials sent to them.
If you are generating a packet that includes screening
documents, you have the option to customize the interval. If the packet
includes screening documents (such as a questionnaire), you will see a Customize link to the right of the
child. Clicking this link will pull up a pop-up box, which includes the
recommended interval. If you would like to use the recommended interval in
order to generate a blank questionnaire for this child’s screening, click the Use Interval button. If you would like
to generate the packet with a different screening interval, you can select that
interval from the drop-down menu and click the Use Interval button.
Once you generate the packet and download the file, the
date in the “Date Last Sent” column will update with the date you generated the
packet.
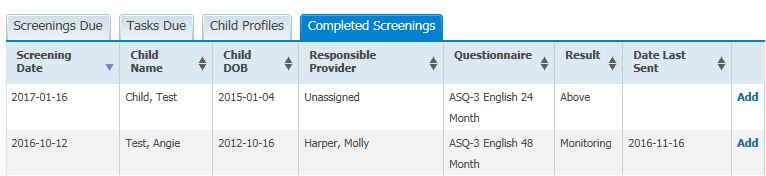
10.5.4.4 Generating via the Completed
Screenings Tab
The Completed Screenings tab will list all completed screenings in your
program, regardless of whether they had associated tasks. You can use this tab
to download a screening packet that includes the completed questionnaire. (NOTE: The completed questionnaire will only
be attached to a related screening packet that includes a questionnaire
document.)
The Completed Screenings tab lists the screening date,
the child name, the child DOB, the responsible Provider, the questionnaire, the
result (Above, Monitoring, or Below), and the date the materials were last sent
to the caregiver. You can search for specific children by date last sent,
screening date, child DOB, child name, child ID, child alt. ID, Provider name,
questionnaire, and result. You can also choose to search for only those
children that have not had materials sent to them.
Once you generate the packet and download the file, the
date in the “Date Last Sent” column will update with the date you generated the
packet.
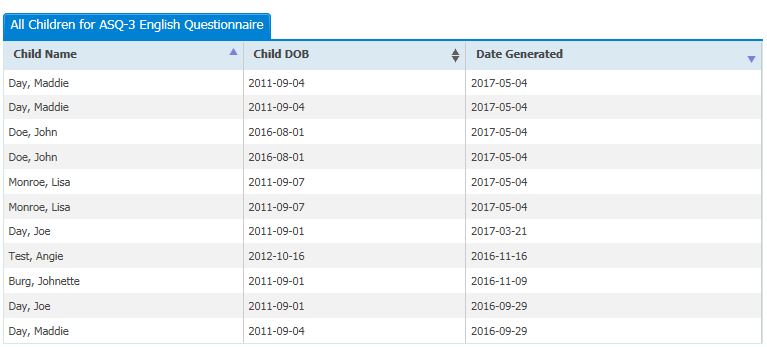
10.5.5 View Child List
If you wish to see a list of all children for whom you have generated a
packet, you can click the Child List link
to the right of that packet. The Child
List page will show you each child for whom that packet has been generated,
the child’s date of birth, and the date the packet was generated for that
child.
You can also search for specific children by date
generated, child DOB, child name, child ID, and child alt. ID.
To view a packet’s Child List:
- Select
Screening Management from the
top navigation menu.
- Select
the View/Print Packets Quick
Link.
- Locate
the system or program packet with the child list you would like to view.
- Click
the Child List link to the right
of the packet.
See also