Home > Program Administrator User Manual > 4 Managing Your Program > 4.2 Managing Program Users
4.2 Managing Program Users
Your ASQ Enterprise program comes with three predefined
roles: Program Administrator (your role), Provider, and Reviewer. You can
assign one or all of these roles to each user in your account.
As the designated Program Administrator, you have the most powerful role. You
can set screening preferences, create program users, create and edit Child
Profiles, assign Child Profiles to Providers, enter screening data, create and manage program
documents and packets, and generate reports. If you are a Family Access
subscriber, you also create your Family Access web page.
The Provider role is designed for users such as
professionals, employees, or contractors of your organization who work directly
with children (e.g., teachers and therapists). Providers have the rights to
create and edit Child Profiles; enter child screening data; schedule tasks;
generate and download documents and groups of documents; and generate
reports.
The Reviewer role is designed for users such as program
directors and school superintendents, who need to review aggregate reports on
children’s progress. Reviewers have the ability to generate reports but cannot
view, add, edit, or delete specific child records or screenings.
4.2.1 Viewing All Program Users
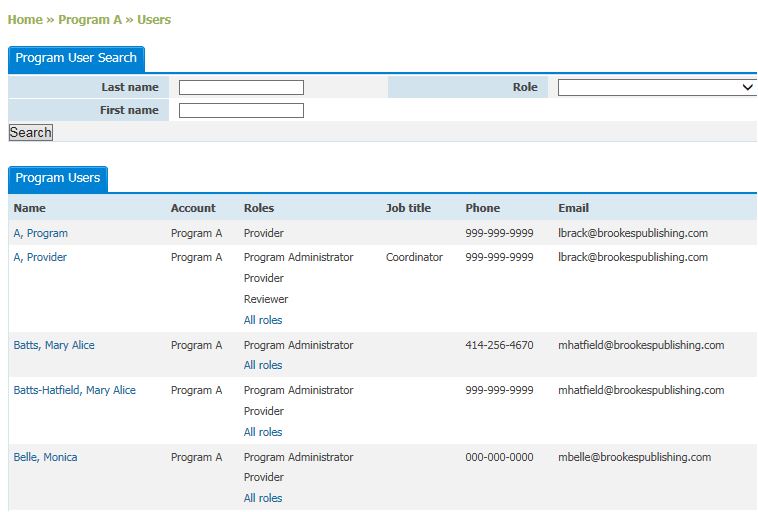
To view a list of all users in your program:
1.
Select Program
from the top navigation menu.
2.
Select the Search
Program Users Quick Link or click View
All next to the Recent Program Users tab.
3.
To view the profile details of a specific program
user, click on his or her name.
4.2.2 Adding Program Users
As Program Administrator, you are responsible for creating the users in
your program. You can create other Program Administrators, who will be able to
perform the same functions that you have access to, and you can also create
Providers and Reviewers.
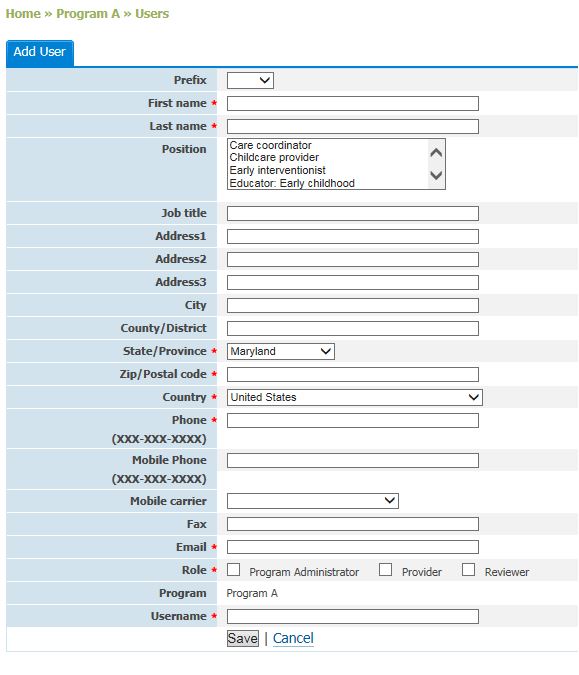
To add a new user:
1.
Select Program from
the top navigation menu.
2.
Click the Add tab
next to Recent Program Users.
OR
3.
Select the Add
Program User Quick Link.
4.
Enter the
following profile information for the new program user. Items marked with an
asterisk [*] are required.
a.
Prefix
b.
First name*
c.
Last name*
d.
Position (choose the appropriate
position from the menu)
e.
Job title
f.
Address1
g.
Address2
h.
Address3
i.
City
j.
County/District
k.
State/Province*
l.
Zip/Postal code
m.
Country*
n.
Phone*
o.
Alternate phone
p.
Mobile phone
q.
Mobile carrier
r.
Fax
s.
Email*
t.
Role* (Program Administrator,
Provider, or Reviewer)
u.
Program (Program name is provided and
not editable)
v.
Username* (see note, below)
5.
Once you have entered the profile
information for the new user, click the Save
button.
Once you click Save, an email will be
automatically generated by ASQ Online and sent to the new user with the email
address provided. That email will
contain a link that will allow the new user to create his or her own password
and then log in to ASQ Online.
NOTE: To avoid
confusion, it is highly suggested that each username you create for a new user
be a combination of that person’s first initial + last name (e.g., I’m adding a
Program Administrator named Nancy Lemon – I will enter her username as: nlemon).
4.2.3 Searching For Program Users
To search for a user:
1.
Select Program from
the top navigation menu.
2.
Select the Search
Program Users Quick Link.
3.
Search for program users by entering information in
any of the following search fields: “Last name,” “First name,” and/or
“Role.”(You may enter more than one field at once to narrow your search.)
4.
Click Search.
5.
Once you have located the user you are looking for,
click on the user’s name to view the individual profile.
NOTE: When searching by first or last name, entering
in a single letter will yield search results that contain that letter (e.g., if
you enter “k” in first name, you will return results for each user who has a
“k” in his or her first name, such as Kim and Derrick).
TIP: By simply selecting “Provider” from the “Role”
drop-down menu, you can easily generate a list of all Providers in the program.
This works for each ASQ Online role.

4.2.4 Viewing a Program User’s Profile
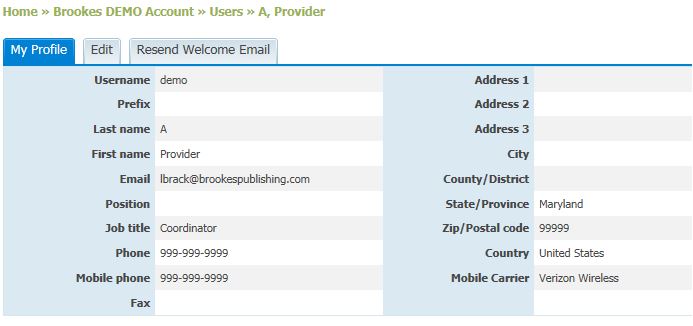
To view profile details and access
associated with a specific program user:
1. Select Program from the top navigation menu.
2. Click View All
next to the Recent Program Users tab or select the Search Program Users Quick Link to see a list of all users in the
program.
3. Click on the user’s name to access his or her
profile.
4.2.5 Editing a
Program User’s Profile
Although it is suggested that you let users edit their
own profiles, there are times when you might need to edit another user’s
profile.
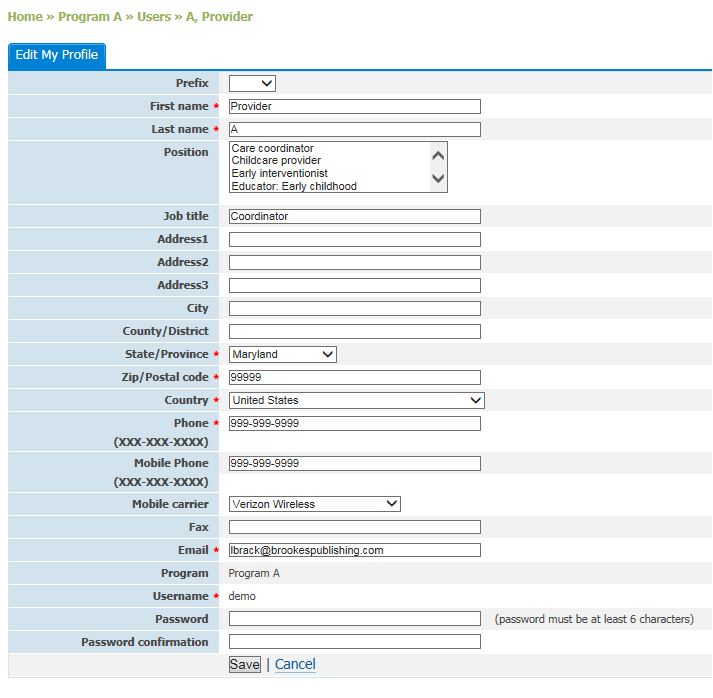
To edit a particular program user’s profile:
- Select Program from the top navigation
menu.
- Click View All next to the Recent Program
Users tab or select the Search
Program Users Quick Link to see a list of all users in the program.
- Click
on the user’s name to access his or her profile.
- Click
on the Edit tab to the right of
the User Details tab to make changes.
Once you have made
the desired changes, click the Save
button.
4.2.6 Deleting
a Program User
If a program user has left the program or no longer needs access to the
program, you may wish to delete the user’s profile.
To delete a program user:
1.
Select Program from
the top navigation menu.
2.
Click View All next to the Recent Program Users tab or select the Search Program Users Quick Link to see a
list of all users in the program.
3.
Click on the user’s name to access his
or her profile.
4.
Click the Delete User tab to the right of the User Details tab.
5.
A pop-up window will appear asking if
you are sure you want to delete this user. Click OK.
6.
The user is now deleted.
NOTE: Once you
delete a user, you will no longer have access to his or her profile
information, and he or she will no longer be able to access ASQ Online. To
allow him or her access to the system in the future, you will have to add him
or her as a new user.
4.2.7 Adding Access to an Existing Program User
If a user already exists within a
program as a Program Administrator, Provider, or Reviewer, you may add
additional access to that user (e.g., you want your Program Administrator to
also have the access rights of a Provider).
To add additional access:
- Select Program from the top navigation
menu.
- Depending
on the type of access you want to add to a user, select one of the
following Quick Links:
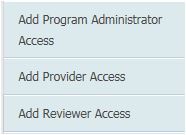
- Add Program Administrator Access
- Add Provider Access
- Add Reviewer Access
- A list
of available program users will appear. You can also search for available
program users by last name and/or first name.
- Click
the check box to the left of the user’s name you wish to add access to,
ensuring a check mark appears. (You can select as many users as you want
to add additional access).
- Click
the Add button in the top right
corner of the Program Users list.
- You
will be taken back to the Program page,
and a message will appear at the top saying, “User access was successfully
added.”
4.2.8 Removing
Access from an Existing Program User
If a user within your program has
access to two or more user roles, it is possible for you to remove that user’s
access to one of the roles, if needed.
To remove user access:
- Select Program from the top navigation
menu.
- Select
the Search Program Users Quick
Link.
- From
the Program Users list, select the user whose access you wish to remove.
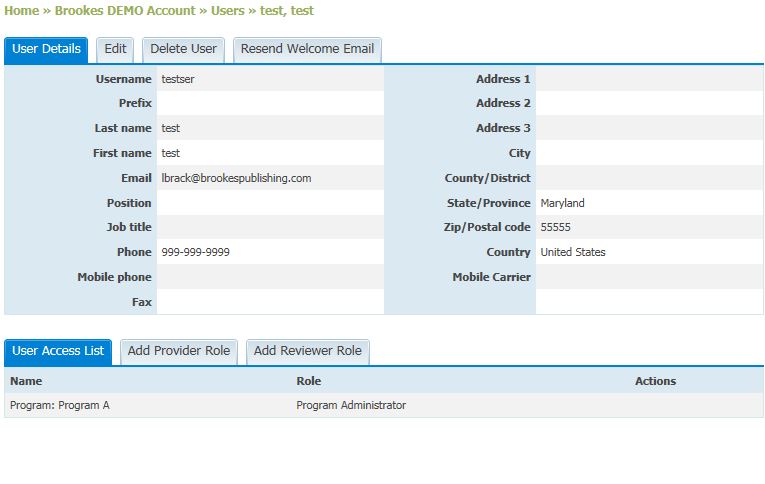
- On the User Details page, there will be a
section titled, “User Access List.” It will list the roles currently
assigned to that user. Under the “Actions” column, select the Remove Role link next to the row
that specifies the user access role you wish to remove.
- A
pop-up window will appear asking if you are sure you want to remove the
user access. Click OK to proceed
with removing the user access.

4.2.9 Assigning
Multiple Children to a Provider
As Program Administrator, you have the
ability to assign one or more children to a Provider at the same time.
To assign multiple children to a Provider:
- Select Program from the top navigation menu.
- Click View All
next to the Recent Program Users tab or select the Search Program Users Quick Link to see a list of all users in the
program.
- Under the Program Users tab, click on the user’s name you
wish to assign children to. You can also search for users by last name, first
name, and/or role. (NOTE: You can only
assign children to a Provider.)
- On the User
Details page of the Provider you selected, there is a tab at the bottom,
called “Child List,” which lists all of the children currently assigned to that
Provider. To assign more children, click on either the Assign Children tab next to the Child List tab, or select the Assign Children to Provider Quick Link.
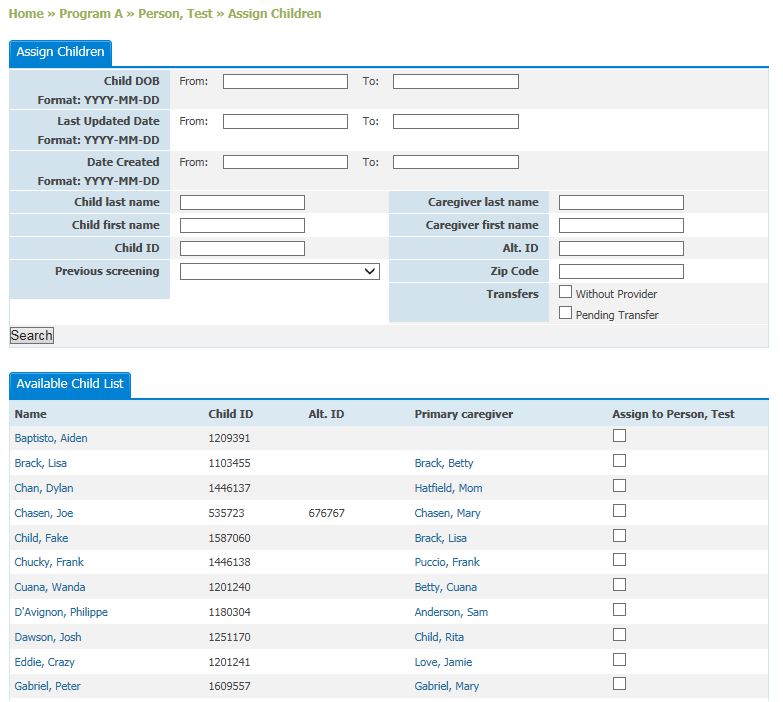
- On the Assign
Children page, there is a list of all of the children available to be
assigned to this Provider (under the Available Child List tab). The list will
include the child’s name, ID, alternate ID, and Primary Caregiver.
- There is a column on the right-hand side of the Available
Child List section that says, “Assign to [Provider last name, first name]” with
checkboxes underneath that correspond to each child listed.
- Click the checkbox next to each child you wish to
assign to this Provider. If you wish to assign all of the available children to
this Provider, you may click the Select
all button at the bottom of the page. Once you are finished selecting the
children to assign, click the Add button
at the bottom of the page.
- You will be returned to the User Details page, and the newly assigned children will appear
under the Child List tab.
4.2.10 Removing a Child Profile from a
Provider
To remove an assigned Child Profile from a Provider:
- Select Program from
the top navigation menu.
- Click View All next
to the Recent Program Users tab or select the Search Program Users Quick Link to see a list of all users in the
program.
- Select the user you wish to remove the Child Profile(s)
from.
- There is a “Remove” column on the right-hand side of the
Child List section. Select the checkbox under “Remove” next to the name of the
child whom you wish to remove. If you want to select all children listed, click
the Select all button, at the bottom.
- Once you have finished selecting the child or children
you wish to remove, click the Update
button.The page will refresh, and a message will be displayed at
the top saying the profile was successfully removed. The child’s name will no
longer appear under the user’s Child List.

See also