To view a list of all screenings within your program:
6.6 Child Profile Screenings
As a Program Administrator, you have the ability to enter screening responses for the children in your program, as well as view, print, and delete screenings. You can add screenings from a child’s profile page, and you can manage screenings from the child’s profile page or the Screenings page. The second tabbed section on a child’s profile page is the Child Screenings section. It if from here that you will be able to view all screenings entered for that child.
To view an individual child’s screenings:
1. Select Child Profiles from the top navigation menu.
2. Browse the Child Profiles list or search for a Child Profile, and click on the child’s name to access his or her profile.
3. Scroll down to the Child Screenings section. The child’s 5 most recent screenings will be listed. To see all screenings for the child, click the View All tab next to the Child Screenings tab.
4. Listed for each screening is the name of the questionnaire, who entered the data into the system, the status of the screening (either “Finalized” or “In progress”), the name of the caregiver who administered the screening, and the date the child was screened.
5. Click on the questionnaire that you would like to view.
6. You will be taken to the Information Summary page for that screening. At the top are tabs with links to each area of the screening. By clicking on the tabs, you can view the questionnaire sheet, as filled out by the caregiver, for each area.
7. You can add a note to the Screening Notes section. This field allows a maximum of 24 characters to be entered. Remember to click Save Notes after adding your note. This note can be edited at anytime by an user who has access to the Information Summary Sheet. This Screening Notes field appears as the top left of the printed Information Summary Sheet and appears in the screening reports as a field.
8. On the Information Summary page for Spanish screenings there is a Language drop down menu on the upper right hand side of the screen. If desired the user may view the Spanish questionnaire in English OR Spanish. Note that the Information Summary will still print in the language of the original questionnaire.
9. When finished viewing the screening, click the Return to Child’s Profile Quick Link, to select and view another screening.
To view a list of all screenings within your program:
1. Select Screening Management from the top navigation menu.
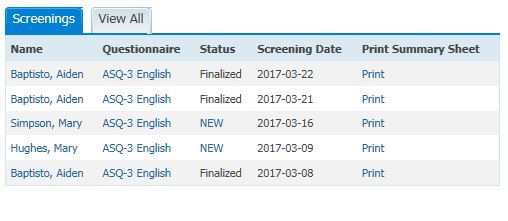
2. Go to the Screenings section (first tabbed section on page) and click View All.
3. Use the Screening Search area to narrow down your results.
4. Listed for each screening is the name of the questionnaire, who entered the data into the system, the status of the screening (either “Finalized” or “In progress”), the name of the caregiver who administered the screening, and the date the child was screened.
5. Click on the questionnaire link to the right of the child's name that you would like to view.
6. You will be taken to the Information Summary page for that screening. At the top are tabs with links to each area of the screening. By clicking on the tabs, you can view the questionnaire sheet, as filled out by the caregiver, for each area.
There are three ways to
print a completed screening for a child. From a Child Profile, you can:
To print just the completed questionnaire:
From a Child Profile:
1. Select Child Profiles from the top
navigation menu.
2. Browse
the Child Profiles list or search for a Child Profile
3. Click on the child’s
name to access his or her profile.
4. Locate the
screening you want to print in the Child Screenings list
5. Click Print next to the name of the
questionnaire you would like to print
6. A pop-up
window will appear asking you if you want to open or save the PDF of the
completed questionnaire. Select Open
7. When the
PDF is visible, either select the Print icon or go to File > Print.
To
print just the Information Summary Sheet:
From a Child Profile:
From the Information Summary Sheet:
1. Select Screening Management from the top navigation menu.
2. Select View All tab in the Screenings section.
3. Click on the questionnaire link to the right of the child's name.
4. On the questionnaire page, click the Print Information Summary under the Quick Links menu.
To print both the completed questionnaire and information summary sheet together:
From the Information Summary Sheet:
1. Select Screening Management from the top navigation menu.
2. Select View All tab in the Screenings section.
3. Click on the questionnaire link to the right of the child's name.
4. On the questionnaire page, click the Print Summary and Questionnaire from under the Quick Links menu.

6.6.2 Deleting Child
Screenings
From a Child Profile, you can delete any
finalized or in progress screening for that child. To delete a screening:
NOTE: Once a
screening is deleted, it cannot be retrieved, so please use caution in deleting
screenings.
NOTE: Deleting a screening has no impact on Screens
Used. When you finalize a screening, you are charged for that screening and
that screen is counted as having been used. It is still included in that count
if deleted. There is no refund for deleted screens.

See also